Description
Description
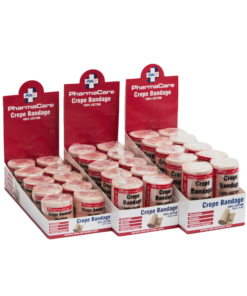
This BV Elastic Net Bandage for dressing retention is made of polyamide and polyurethane. It has excellent dermophilic properties and air circulation, doesn’t limit movements and is very comfortable. With simple cuts, the BV Elastic Net Bandage can be applied to the different parts of the body, even the most difficult ones to reach. The stretched length of the bandage is 25m, and the unstretched length is 7m. Elasticity lengthwise is over 300%, and elasticity widthwise is approximately 10 times the initial width. This bandage comes in a dispenser shelf box.
- Size 1 – 1.6cm x 25m and for use on the hand, wrist and forearm
- Size 2 – 1.8cm x 25m and for use on the elbow, arm, leg and foot
- Size 3 – 2.1cm x 25m and for use on the knee
- Size 4 – 2.4cm x 25m and for use on the upper leg and shoulder
- Size 5 – 2.7cm x 25m and for use on the head and neck
- Size 6 – 5.5cm x 25m and for use on the chest and abdomen
- Size 7 – 5.7cm x 25m and for use on the chest and abdomen
- Size 8 – 6.3cm x x 25m and for use on the chest and abdomen
Uses
The BV Elastic Net Bandage is used for dressing retention and can be used on a number of different body parts, depending on what size you are using.
- Size 1 can be used on the hand, wrist and forearm
- Size 2 can be used on the elbow, arm, leg and foot
- Size 3 can be used on the knee
- Size 4 can be used on the upper leg and shoulder
- Size 5 can be used on the head and neck
- Size 6, 7 & 8 can be used on the chest and abdomen
Application
Finger with Applicator:
• Cut a piece of net to the required size (±15cm) and put it on the applicator
• Introduce the applicator onto the finger with the dressing on the wider side
• Hold the net at the base of the finger and slowly pull the applicator until it gets to 7cm of the tip of the finger
• Spin the applicator to roll up the net at the tip of the finger
• Introduce the applicator on the finger again
• Remove the applicator and adjust the net at the base of the finger if necessary.
Finger without Applicator:
• Cut a piece of the net with the size “A” and “B”. Size A is the tip of the finger to the bottom of the finger, and size B is the bottom of the finger to the wrist
• Introduce the finger with the dressing in the net until it is completely covered
• Stretch the end of the net and spin it until it gets fixated
• Cover the hand with the net and fold it on the wrist
• Cut about 4cm of the net at the palm of the hand, below the finger with the dressing.
• Cut the extra material around the unaffected fingers
• The net will remain firm at the hand, allowing all kind of movements.
Securing a dressing on the hand or wrist:
• Measure the distance between the wrist to the tip of the fingers
• Cut a piece of the net with the same distance
• Expand the net to its maximum, introducing the hands inside the net
• Apply the net on the hand in order to fixate the dressing
• Cut four threads on the top – one for the ring finger, one for the index finger, one for the middle finger and one for the thumb
• Fixate the fingers, passing them through the cut threads. Cut the threads wider if needed
• The net will remain firm at the hand, allowing for flexible movement
Foot:
• Cut a piece of net that will fit over the foot area
• Expand the net to its maximum, introducing the hands inside the net
• Apply the net over the dressing, removing one hand first and then the other
• Make a small fold, directed inside, on both ends of the net
• To check the wound or to change dressings just raise the net
Toes:
• Cut a piece of net with the size “A” and “B” – Size A is the distance from the tip of your toe to the bottom of the toe, and size B is the foot area
• Apply the net only in the toe with the dressing
• Stretch the rest of the net and spin it to fixate the dressing
• Cover the foot with the net
• Cut about 4 or 5 threads in the heel to release it
• Cut about 4 or 5 threads near the toes to release them
• The dressing will get fixated, and the net will become comfortable
Heel:
• Cut a piece of net of about 30cm
• Expand the net to its maximum, introducing the hands inside the net
• Apply the net onto the foot but without going beyond the ankle
• To release the fingers, open the net with both hands and apply again, creating a second layer
• Fold about 2cm of the net, in order to create a hem
• Cut about 4 or 5 threads in the heel but just on the second net layer
• The dressing will be fixated by the first layer and the second layer will keep the dressing fixated to the heel
Arm & Elbow:
• Cut a piece of the net to cover the width of the elbow / arm area
• Expand the net to its maximum, introducing the hands inside the net
• Apply the net over the dressing, removing one hand first and then the other
• Make a small fold, directed inside, on both ends of the net
• To check the wound or to change dressings just raise the net
Knee:
• Cut a piece of net the width of the knee area
• Expand the net to its maximum, introducing the hands inside the net
• Apply the net over the dressing, removing one hand and then the other
• Make a small fold, directed inside on both ends of the net
• To check the wound or to change dressings just raise the net
Upper Leg:
• Cut a piece of net the width of the area you want to cover on the leg
• Expand the net to its maximum, introducing the hands inside the net
• Apply the net over the dressing, removing one hand and then the other
• Make a small fold, directed inside on both ends of the net
• To check the wound or to change dressings just raise the net
Shoulder:
• Cut a piece of net the width of the shoulder area
• Cut 15cm of the net at about 6cm of one of the ends of the net
• This cut should be done on both layers, thus creating a small opening
• Introduce both hands where the net has not been cut
• The cut part should be placed on top of the hands
• Stretch the net and apply it on the patient’s arm
• Pass the head and arm through the previously cut opening
Head:
• Measure the distance between the neck and the end of the skull
• Cut a piece of the net with that same distance
• Expand the net to its maximum, introducing the hands inside the net
• Apply the net on the patient’s head, leaving one end of about 5cm at the top
• Cut the net on the nose area, try to get a round opening for the face
• Cut more threads if necessary to get the face more comfortable
• Introduce the end of the top part of the skull inside the net
Torso & Shoulder:
• Cut about 60cm of net
• Make a ‘V’ shape cut (between the torso and arm) 20cm above the lower end
• Introduce the hands inside the net
• To introduce the head, the ‘V’ shape cut must be facing upwards
• Stretch the net to its maximum and introduce the arm with the dressing, keeping the ‘V’ shape cut at the upper part of the arm
• Pass the head through the ‘V’ shape cut in the net
• Stretch the net in order to cover the other arm
• Make a horizontal cut in 4 or 5 threads of the net at approximately 4 fingers below the shoulder line
• Pass the arm through the cut and extend the net on thorax
Torso:
• Cut a piece of the net the length of the torso area
• Expand the net to its maximum, introducing the hands and the arms inside the net
• Apply the net on the patient’s torso, introducing it through the head
• Cut 4 or 5 threads four fingers below the shoulder line
• Pass the arms through the previously cut opening
• Cut more threads to get the arms more comfortable if necessary